
Step One |
Plotting and GraphingThe first thing you want to do is find a relatively smooth, flat surface (unless you're going for textured effects); either a sidewalk, or a part of the road that's not being used for cars. Then you have to clear it of all gravel and junk, and maybe mark it off so that people won't walk through it while you're working. Next you take a ruler and divide the picture you're working off of into grid squares, then you divide the plotted area into grid squares that are to scale. If you're working alone, you should start in the upper left-hand corner if you're right handed or in the upper right-hand corner if you're left handed. If you're working with someone else, assign different grid squares to different people based on either convenience or talent (ex: if they're good at faces, assign them the squares with faces, etc.). |
|
Step Two |
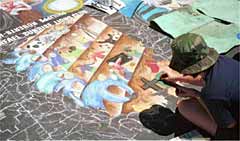 |
Sketching and FillingNow you should make a quick sketch of the main points in the painting so that you know you have the proportions correct and to scale (one person should do this so that the grids match up). Once you've done that you can begin the "Painting", filling in the squares to the best of your ability, hopefully it'll look like the painting you're working off of, unless you're doing a freelance in which case you just fill it in however. If you're allergic to the chalk you should wear gloves and long pants. |
Step Three |
Preserving and Documenting: OptionalIf you want to preserve it (which I don't do because it involves toxic chemicals) you can shellac it, but you have to have permission if you're doing it on privately own property or outside of a shop or hotel. I prefer taking pictures of my work, but developing is hell if you do too many. |